
Many people suffer from sensitive spots in muscle, often called muscle knots. Knots in our muscles can develop suddenly or over time, last for a few hours or the long term and often leaving us confused on how we got them. Fortunately, foam rolling is a great tool to use to help get rid of those muscle knots.
We call them “muscle knot” because they feel like our muscles are tied up in – you guessed it – tight knots. Unfortunately these knots are extremely common. You’d be hard pressed to find anyone who hasn’t experienced a muscle knot at some point. Though they can be problematical, they can also be quite manageable.
What exactly are muscle knots?
When you say that you have “muscle knots,” you are actually talking about myofascial trigger points. There are no actual knots involved, of course though they do feel like knots.
Myofascial derives from the words “myo,” which is Greek for muscle, and “fascia,” which refers to the muscle’s tough outer lining that keeps it in place. Fascia is one of the 3 types of dense connective tissue (the others being ligaments and tendons) and it extends without interruption from the top of the head to the tip of the toes.
The term “muscle knot” is used to describe a variety of painful issues affecting the fascia, such as areas of muscle that are painful with pressure or a highly irritable localized spot. A myofascial trigger point is a small patch of tightly contracted muscle tissue in an isolated spasm, (not a whole-muscle spasm like a “charlie horse” or cramp). The tissue can become thick, tough and feel knotted. When this patch of muscle tissue spasms the knotted muscle cuts off its own blood supply, which irritates it even more — a vicious cycle.
The “muscle knot” or trigger point can occur in muscle, the muscle-tendon junctions, bursa, or fat pad. Sometimes, trigger points can be accompanied by inflammation and if they remain long enough, what was once healthy fascia is replaced with inelastic scar tissue.
What causes a trigger point to form?
The list of probable causes includes physical trauma, poor posture or movement mechanics, over training, inadequate rest between training sessions and possibly even nutritional factors.
According to many therapists, trigger points in the fascia can restrict or alter the motion of a joint resulting in a change of normal movement and neural feedback to the central nervous system. Eventually, the neuromuscular system becomes less efficient, leading to premature fatigue, chronic pain and injury and less efficient motor skill performance.
It has been speculated that trigger points may lead to a variety of sports injuries – from camps to more serious muscle and tendon tears. The theory, which seems plausible, is that trigger points compromise the tissue structure in which they are located, placing a greater strain on other tissues that must compensate for its weakness.
How do I get the knots out?
Self-myofascial release (SMFR) is a relatively simple technique that active individuals can use to alleviate trigger points. It can aid in the release of soft tissue, myofascial adhesions and fascial restrictions. Ultimately it helps aid in the relaxation of tense tissues.
Myofascial Release techniques utilize an individual’s body weight and/or muscular force along with various devices such as the foam roller which can be found in a variety of densities, tennis balls, hard rubber balls, golf balls, medicine balls, thumb pressure, pressure knobs, and a device known as “The Stick.”
The Goal of Self Myofascial Release
The goal of SMFR or “Foam Rolling” is to first inhibit localized tender regions in soft tissue by applying deep yet tolerable prolonged pressure. The deep pressure should be held on the tender spot until tenderness is reduced by approximately 50 to 75 percent.
Once the tenderness subsides, performing slow, rhythmical movements compresses and lifts the soft tissues, aiding in the breakdown of superficial myofascial adhesions. It also increases the fluidity of movement within the soft-tissue complex.
An individual’s progress can be measured by decreased tenderness, increased range of motion, and improvements in posture.
Contraindications include increased pain as opposed to discomfort which subsides on tender spots within 60 seconds, dizziness or nausea. SMFR “Foam Rolling” should not be performed on any area that has had recent trauma such as bruising. Always be sure you are not applying the deep prolonged pressure on bony areas, soft tissue only (muscle).
General Guidelines
- Spend 1-2 minutes per body part each side (when applicable).
- When a trigger point is found (tender area) hold for 30-45 seconds or until the tenderness is reduced by approximately 50 to 75%.
- Keep the abdominal muscles tight which provides stability to the lower back and core during rolling.
- Remember to breathe slowly as this will help to reduce any tense reflexes caused by discomfort.
- Complete the self-myofascial release exercises 1-2 x daily.
Self-Myofascial Release Exercises
For these exercises you will need a foam roll – you can get them from anywhere that sells sports medicine or physical therapy supplies or online retailers.
Calves Self-Myofascial Release
- Place calves on the roll with hips unsupported
- Feet can be crossed so that only leg at a time is one the foam roll
- Roll from ankle toward posterior knee
- If a “tender point” is located, stop rolling, and rest on the tender point until pain decreases by 75%
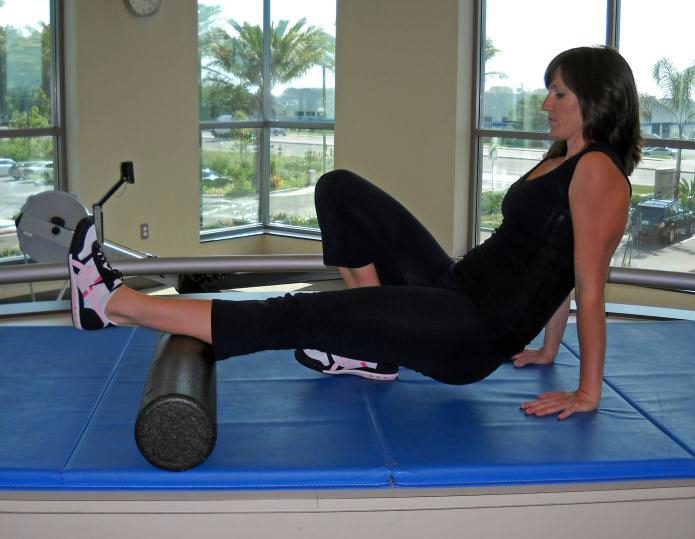
Hamstring Self-Myofascial Release
- Place hamstrings on the roll with hips unsupported
- Feet can be crossed so that only leg at a time is one the foam roll
- Roll from knee toward posterior hip
- If a “tender point” is located, stop rolling, and rest on the tender point until pain decreases by 75%
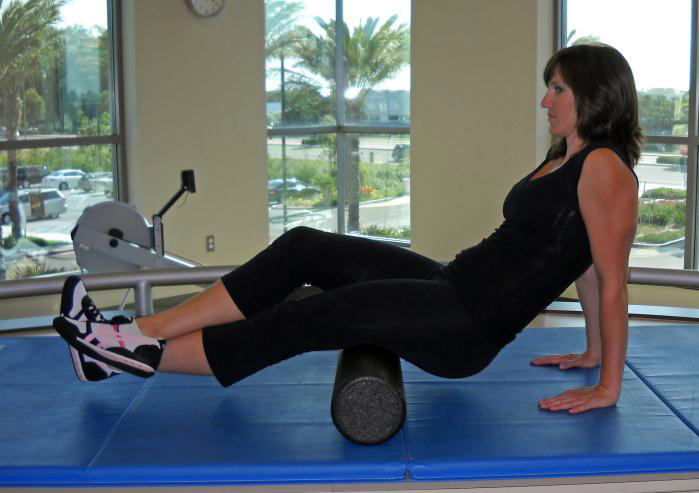
Glutes/Piriformis Self-Myofascial Release
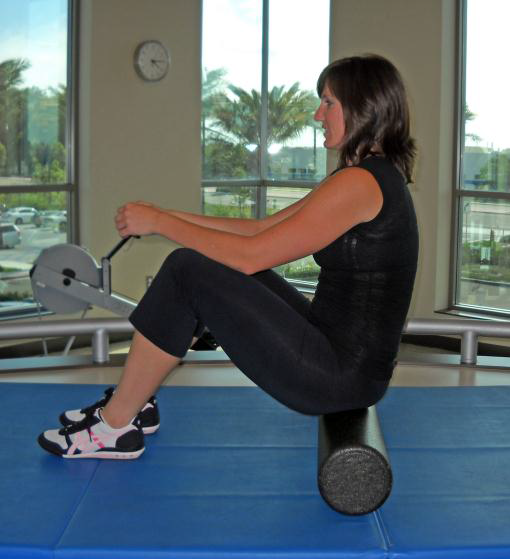
- Start by sitting on foam roll
- Position yourself on your side with foam roll under hip
- One Leg crossed with had supporting body weight on same side
- Roll to side of hip and gluts
- This may be PAINFUL for many, and should be done in moderation
- If a “tender point” is located, stop rolling, and rest on the tender point until pain decreases by 75%
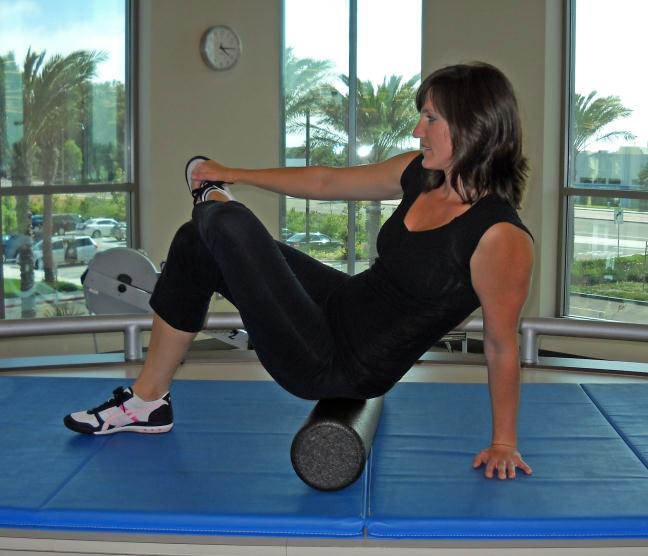
Iliotibial Band (IT Band) Self-Myofascial Release
- Position yourself on your side lying on foam roll
- Bottom leg is raised slightly off floor keep forearm down on floor
- Maintain head in “neutral” position with ears aligned with shoulders
- This may be PAINFUL for many, and should be done in moderation
- Roll just below hip joint down the outside thigh to the knee
- If a “tender point” is located, stop rolling, and rest on the tender point until pain decreases by 75%
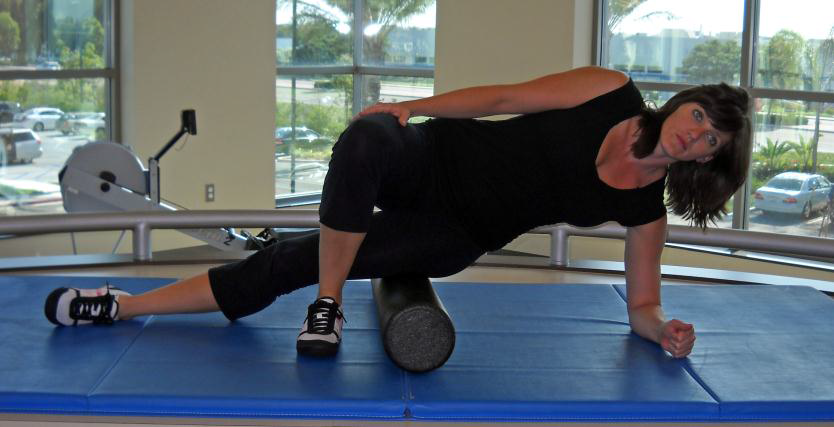
Quadriceps Self-Myofascial Release
- Body is positioned prone (face down) with quadriceps on foam roll
- It is very important to maintain proper core control (abdominal drawn-in position & tight gluteus) to prevent low back compensations
- Roll from pelvic bone to knee, emphasizing the lateral (outside) thigh
- If a “tender point” is located, stop rolling, and rest on the tender point until pain decreases by 75%
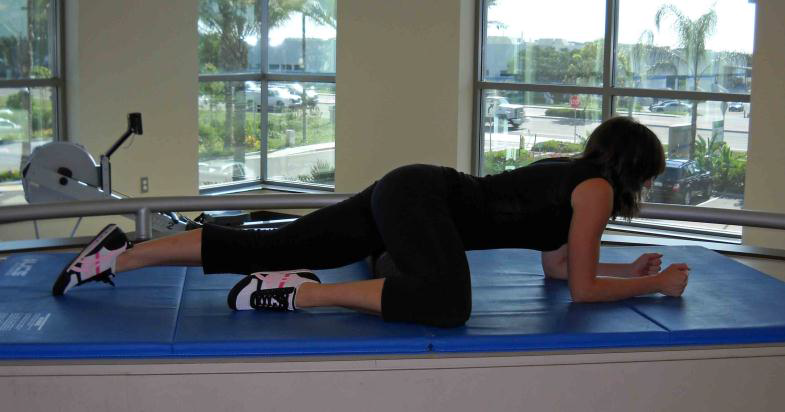
Adductor Self-Myofascial Release
- Extend the thigh and place foam roll in the groin region with body prone (face down) on the floor
- Be cautious when rolling near the adductor complex origins at the pelvis
- If a “tender point” is located, stop rolling, and rest on the tender point until pain decreases by 75%
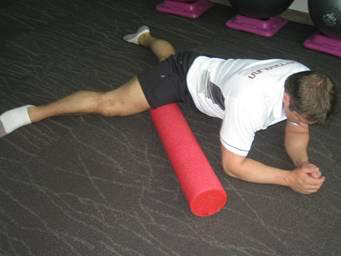
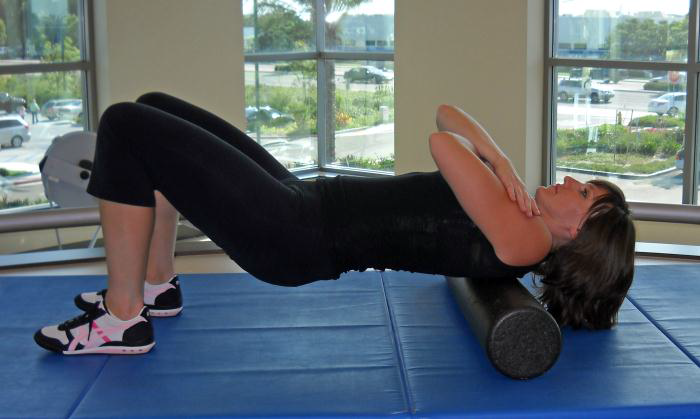
Upper Back Self-Myofascial Release
- Place hands behind head or wrap arms around chest to clear the shoulder blades across the thoracic wall
- Raise hips until unsupported
- Stabilize the head in a “neutral” position
- Roll mid-back area on the foam roll
- If a “tender point” is located, stop rolling, and rest on the tender point until pain decreases by 75%
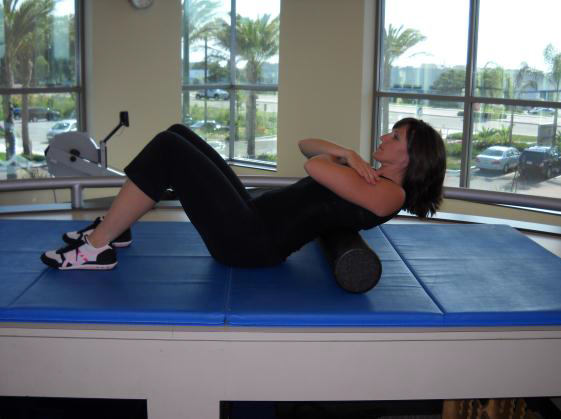
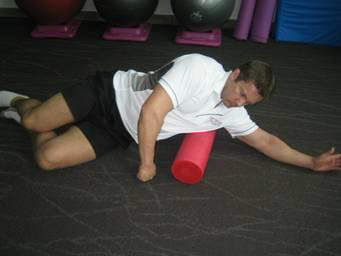
Lateral Back Self-Myofascial Release
- Position yourself on your side lying on foam roll
- Foam roll should be positioned just below the arm pit
- Maintain head in “neutral” position with upper arm and shoulder aligned with ears
- This may be PAINFUL for many, and should be done in moderation
- Roll just below shoulder joint up the outside of the arm pit and arm
- If a “tender point” is located, stop rolling, and rest on the tender point until pain decreases by 75%
A progression with the Self-Myofascial Release technique
Involves SMFR with contraction of the opposite muscle from the muscle that is being rolled (Antagonist Contraction), also known as “Pinning”; this involves contraction of the opposite muscle through movement.
An example of this would be once the tenderness has reduced while rolling out the front of the thigh (quads) in a prone position (picture 1); slowly bend the knee into flexion and extension while pressure is maintained on the knot or trigger point (picture 2).
This technique can be viewed as “pinning down” the soft-tissue knot and actively lengthening the restricted tissue via the muscle contraction.
This technique can be performed up to 10 times holding each end range for up to 10 seconds.
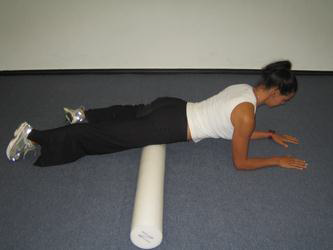
Picture 1
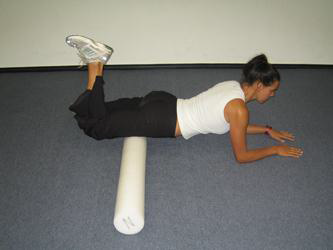
Picture 2 – Notice the bend in the knee

